Using Ajax File Browser in IE 9 and Earlier Versions with IIS 7.x and IIS 8 WebDAV
Important! This article is about upload in IE 9 and earlier versions. If you are using IE 10+, Chrome 4+, Firefox 7+, or Safari 4+ you do not need to read this article.
As soon as Internet Explorer 9 and earlier versions does not support standards-compliant PUT upload, the Ajax File Browser is using POST method to upload file content to the server when used in IE 9 or earlier is detected. Therefore, your server requires non-standard processing of POST request. The Ajax File Browser is shipped with a module, called PostUploadModule, for processing POST requests that you can use with Microsoft WebDAV Extension for IIS 7.x and IIS 8. Below we describe how to install it.
Important! This module is designed to work only with Microsoft WebDAV Extension for IIS 7.x and IIS 8. You should not enable this module on websites running IT Hit WebDAV Server Engine. The IT Hit Engine provides its own POST processing module.
Installing the PostUploadModule
The PostUploadModule DDLs are located in \OptionalServerModules\Iis7xPostUploadModule\Bin folder in Ajax File Browser archive. There are 2 DLLs provided, for 32-bit and 64 bit platforms.
- Extract the required DLL to some folder.
- Ensure that Windows account under which your application pool is running has Read right on the DLL.
- Open the IIS administration console.
-
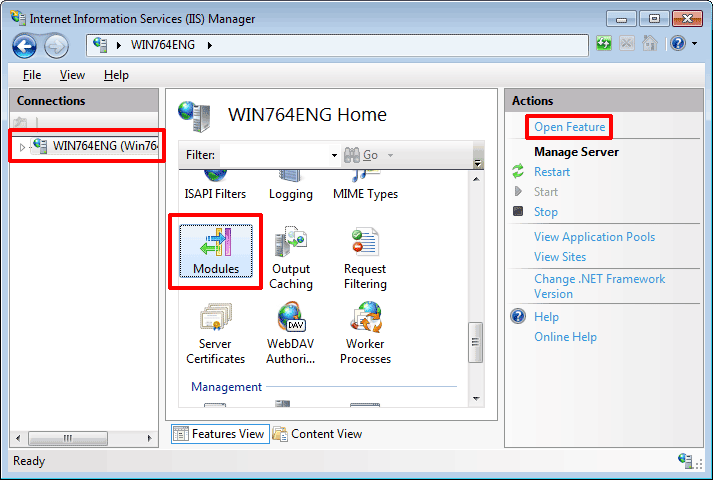
Select root node (with the name of your computer) in the Connections pane, located at the left part MMC snap-in. Select Modules, click Open Feature link.
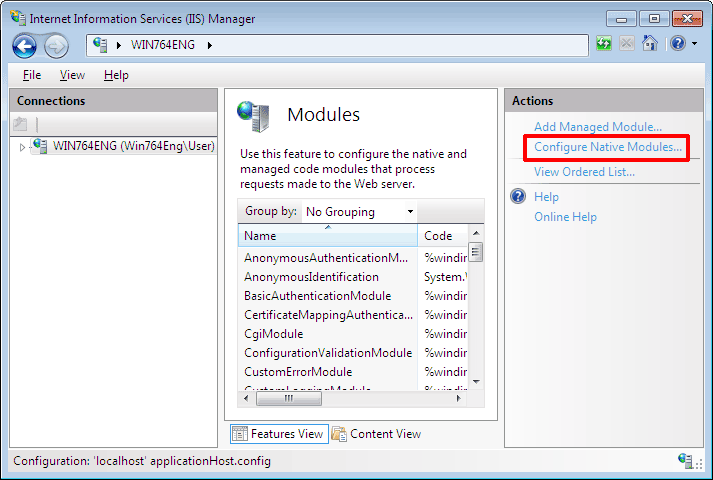
- In Modules click Configure Native Modules link.
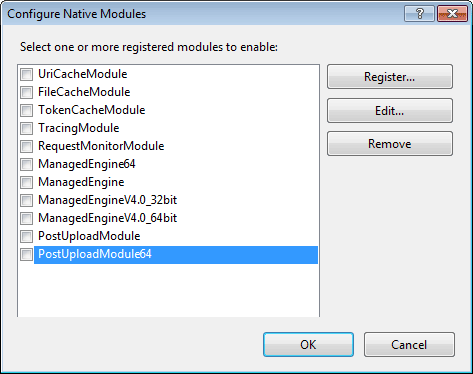
- Register module for the corresponding platform or both by clicking Register and choosing the path to the module. Even if you register both modules only one module will be used, either 64 or 32 bit, depending on your platform. Do not check the checkbox for the modules, you will enable the module later, at the site level.
- Go to Handler Mappings at the root node.
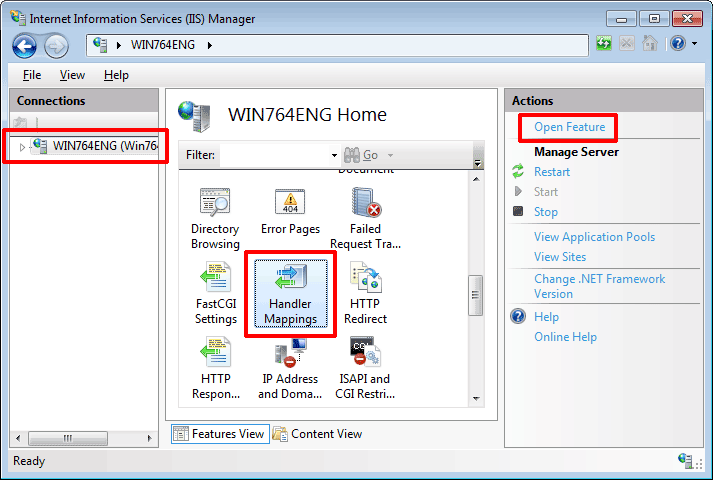
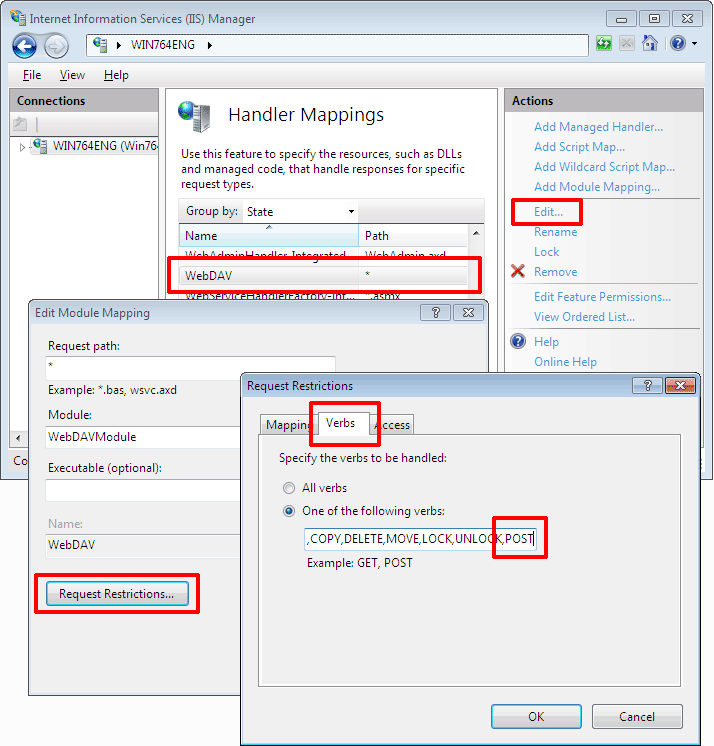
- 8. Select WebDAVmodule and click Edit. In Edit Module Mapping dialog click Request Restrictions…. In Request Restrictions dialog, select Verbs tab. Add POST verb to the list of allowed verbs. Finally, click OK in Request Restrictions and Edit Module Mapping dialogs.
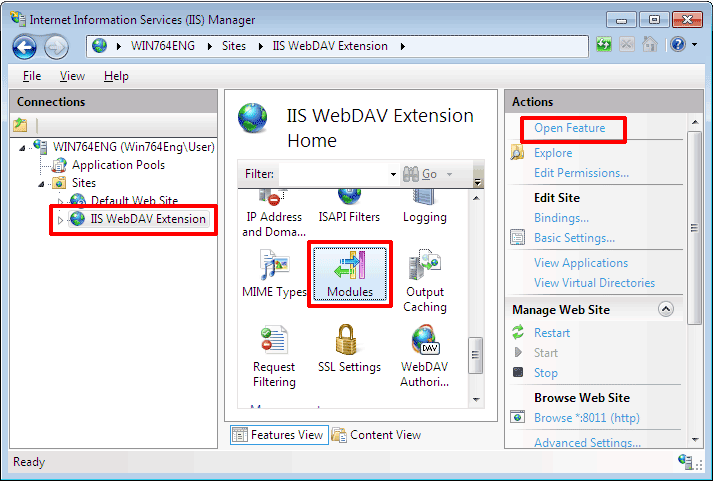
- Go to Website on which Microsoft IIS WebDAV Extension is enabled. Select Modules, click Open Feature link.
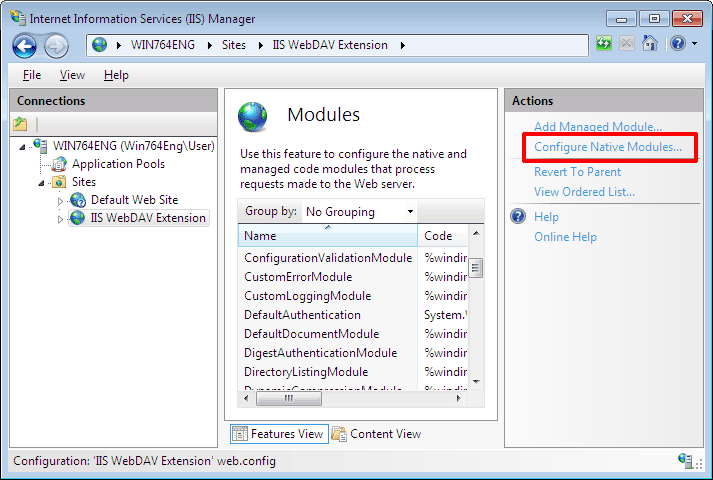
- In Modules click Configure Native Modules link.
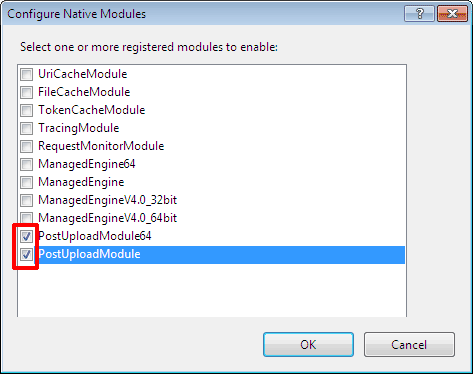
- This timecheck the PostUploadModule(s) and click OK.
