How to Configure Your WebDAV Server in IIS
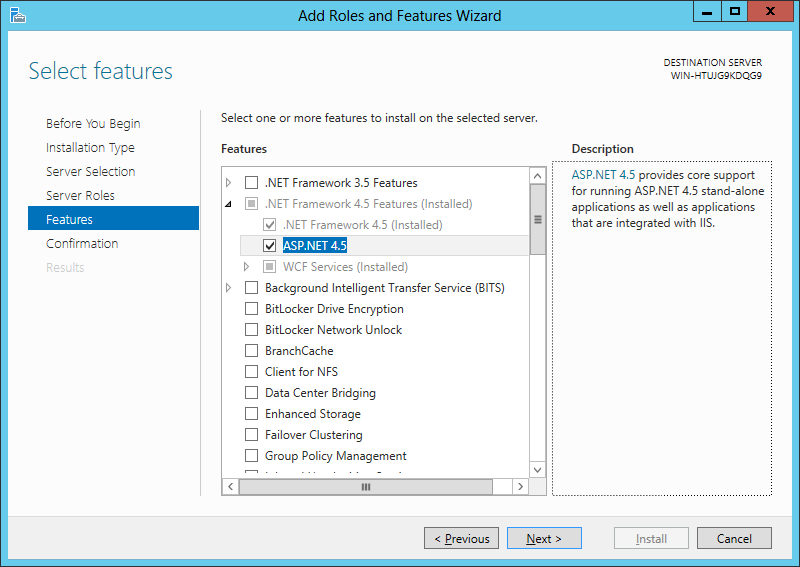
Below we will describe how to configure your WebDAV server in IIS. To run your application in IIS, you must have ASP.NET 3.5 or later feature enabled on your computer. On the screenshot below you can see ASP.NET 4.5 feature is being enabled on Windows Server 2012:
Create a new Application Pool
Go to Application Pools node and select Add Application Pool in the context menu. Fill in the application pool name in the App Pool Dialog and click OK:
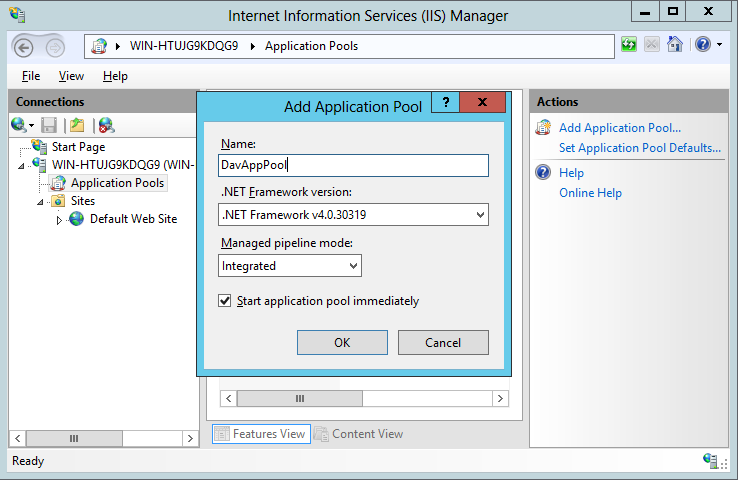
While IT Hit WebDAV Server Engine supports both .Net Framework 3.5 and higher, that is it can run on .Net 2.0 Application pool, as well as it supports both Integrated and Classic pool mode, it is recommended to use .Net 4.0 pool with Integrated mode pool. Note that if you wish to run .Net 2.0 pool you must set a reference to ITHit.WebDAV.Server.dll located in \Program Files (x86)\IT Hit\WebDAV Server Engine\<version>\Server\bin\.Net 3.5\ folder, change the target framework of your project to be the .Net Framework 3.5 and recompile the project.
By default, your WebDAV web application will run under the ApplicationPoolIdentity. To verify or change your application pool identity, select the new application pool in Applications Pool list and select Advanced Settings:
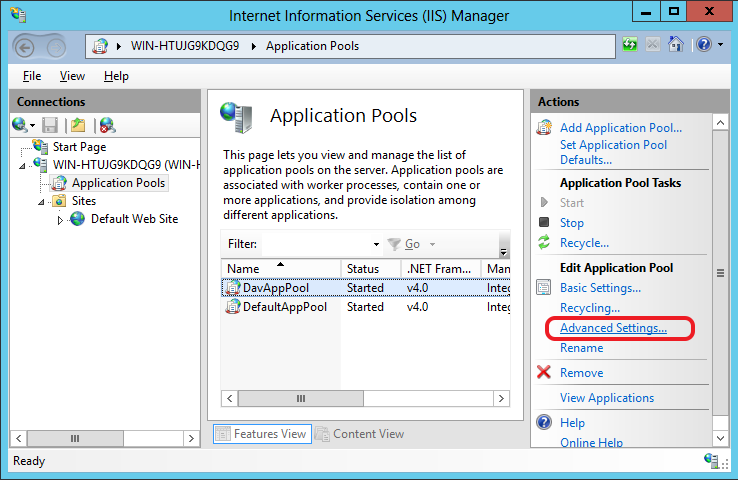
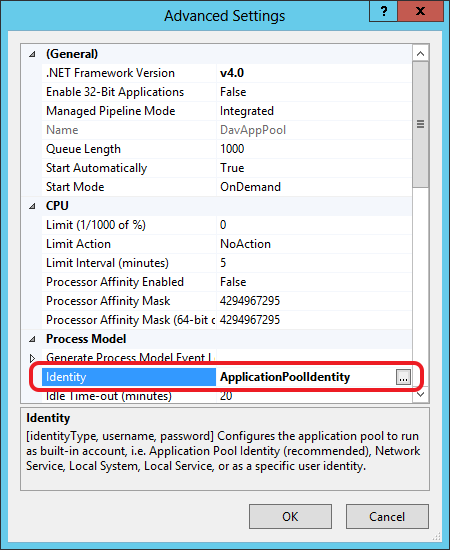
Understanding under which identity your application is running, is important, as you will be granting permissions in the file system to Windows account associated with it at later steps. The name of the Windows account associated with ApplicationPoolIdentity identity depends on your application pool name. In case you named your pool 'DavAppPool', the name of the Windows account is ‘IIS APPPOOL\DavAppPool’. This Windows account is created and managed automatically by IIS, you do not need to create it manually.
Configure File System Permissions.
-
Grant permissions on the sample root folder. Grant Read permissions to your application pool identity in \Samples\<SampleName>\ folder. Right-click on the \Samples\<SampleName>\ folder in Windows Explorer and select Properties. Go to Security tab in<SampleName> Properties dialog and click Edit. In the Permissions for <SampleName> dialog click Add.
In case you are using ApplicationPoolIdentity and your application pool name is DavAppPool specify IIS APPPOOL\ DavAppPool in the Enter the object names to select field: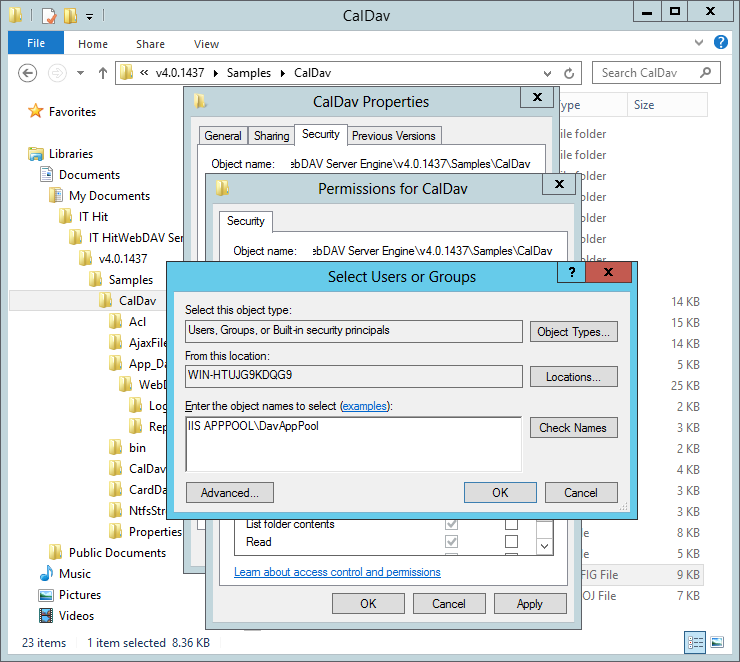
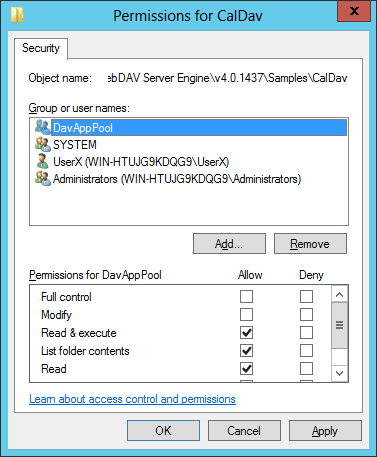
Click OK in the Select Users or Groups dialog. Close <FolderName> Properties dialog.
-
Grant permissions on the Logs folder. Grant Read, Write, and Modify permissions to your Application pool identity in the \Samples\<SampleName>\App_Data\WebDAV\Logs\ folder:
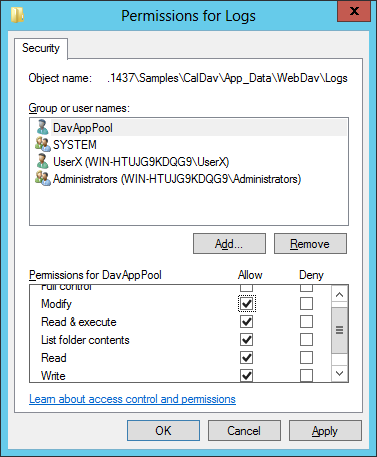
Your WebDAV server will create log files in this folder. In case you experience any issues with your WebDAV server examine your log files for any errors and exceptions logged.
-
Grant permissions on the Storage folder. If your files are stored in the file system, grant Read, Write, and Modify permissions to your Application pool identity in the \Samples\<SampleName>\App_Data\WebDAV\Storage\ folder.
Create a Web Application
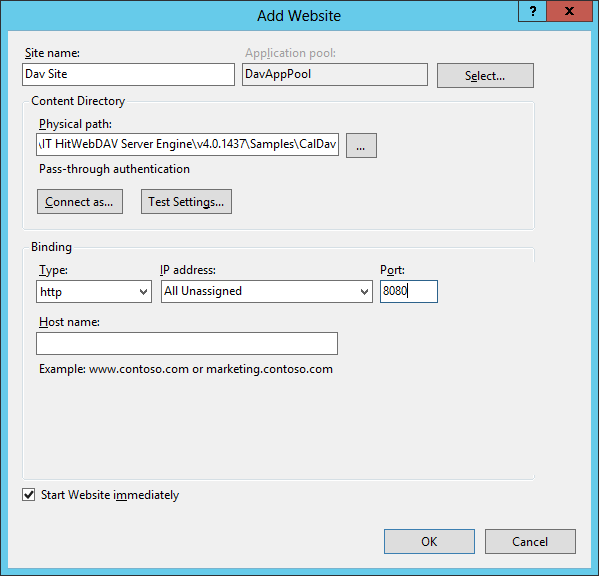
Go to the Sites node in IIS Manager and select Add Website in the context menu. Fill in the Site name in the Add Website dialog and select the application pool that you have created above (DavAppPool).
In the Physical path field provide the path to the folder where your web.config file is located, for instance for CalDAV sample installed from MSI package this should be: C:\Users\<WinUserName>\Documents\IT Hit\IT HitWebDAV Server Engine\<version>\Samples\CalDav\.
Specify Binding options, such as hostname and port. Click OK.
In addition to HTTP access, you may also need to configure SSL/HTTPS, at least with a self-signed certificate.